Near Field Communications With Rhodes Peer-to-Peer Tutorial
This tutorial will guide you through running peer-to-peer near field communications with Rhodes. Near field communication is very similar to RFID, and you can even use near field communications to read RFID tags. It has features to have two devices communicate with each other, as well as act as mobile business cards.
As of Rhodes version 3.3.3, the NFC API is removed from Rhodes. This feature is only supported in Zebra RhoMobile Suite. If you wish to use this feature, you will need to upgrade to RhoMobile Suite. Your application’s build.yml will also need to be modified to indicate the application type is ‘Rhoelements’. Additionally, a RhoElements license is required.
- Source Code
- Webinar Video
- Pre-requisite Reading
- Setup
- Understanding NFC Peer-to-Peer
- Start Push Function
- Stop Push Function
- NFC Callback
- Displaying the NFC P2P Event in the View
- Running nfc-rhodes Peer-to-Peer
Source Code
The source code for this example is located here.
Webinar Video
Pre-requisite Reading
- RhoStudio Tutorial
- RhoMobile Suite install
- Rhodes Installation from command line
- Rhodes NFC
- Android SDK
Setup
This tutorial assumes that you know how to edit a Rhodes application, and that you have Rhodes version 3.0.1 or higher. It assumes that you have installed Android SDK level 2.3.3, and set paths in your profile to your Android SDK and its tools folder. It also assumes that you have installed Google APIs:10 (which is based on Android 2.3.3), and that you created an AVD (Android Virtual Device) for the Google API. If you do not know how to do this, see Pre-requisite Reading.
If you have any Android SDK installed, you can check to see if it has Android 2.3.3 and Google APIs:10. Go to your tools folder in your Android SDK and run android. In the Android SDK and AVD Manager, click Installed packages. If you do not see SDK Platform Android SDK 2.3.3 and Google APIs by Google Inc., Android API 10 in the list of installed packages, click on Available Packages, find them, and install them. Also click Virtual Devices and check that you have an AVD (Android Virtual Device) set up for Google API level 10; create one if you do not.

The webinar and this tutorial show Android running from the command line, rather than an IDE such as Eclipse. You can also run from Eclipse.
You can go to the source code for the Rhodes Webinar Sample for nfc-rhodes, a Rhodes project which receives nfc tags, is stored. You can copy this project to your local computer.
Checking the Rhodes Application for NFC
In the build.yml file for the nfc-rhodes project, there is an android section which has the nfc extension, and a version of at least 2.3.3. This is needed to enable NFC on your NFC-capable device.
android:
  version: 2.3.3
  extensions:
  - nfc
Require Nfc
In app/application.rb, a line is added to require nfc. Since nfc is an extension, this require is not generated automatically.
require 'nfc'
Hooking and Processing the NFC Events from the nfc-rhodes app
Rhodes provides a hook called on_activate_app that is called every time an application using this hook launches, and when the application comes in from the background. The on_activate_app hook is used in the nfc-rhodes project, where it enables nfc and sets a couple of callbacks. When the nfc event occurs (set_nfc_callback), it will make a callback request to the controller action app/Nfc/nfc_callback. When the app receives a tech callback (set_nfc_tech_callback), it will make a callback request to the controller action app/Nfc/nfc_tech_callback. Also, perform_open_application_event processes the event in the callback (it says, okay, Rhodes, process the nfc event).
def on_activate_app
  Rho::NFCManager.enable

  Rho::NFCManager.set_nfc_callback("/app/Nfc/nfc_callback")
  Rho::NFCManager.set_nfc_tech_callback("/app/Nfc/nfc_tech_callback")

  Rho::NFCManager.perform_open_application_event
end
Understanding NFC Peer-to-Peer
The nfc-rhodes project also has peer-to-peer code to send and receive push messages. The device that is sending the push message will trigger a start push event for NFC, and when that device comes within NFC range of another device that is listening for NFC messages, it will transmit the message. It will keep transmitting the message every time it comes within range, so in your application, you have to turn the NFC trasmission on and off. Therefore, the nfc-rhodes project has a start push function and a stop push function.
Start Push Function
In the start_nfc_push controller action, for debugging purposes, the first line displays the form where you put in the push message; it prints the push message out to the console.
Then it creates an NFC payload using the NFCManager.make_payload_with_well_known_text method. Then you have to prepare the payload to assign it to the NFC chip on the device. You put the payload inside a hash, since this is an Ndef record.
From that hash, it makes an Ndef record with the NFCManager.make_NdefRecord_from_hash method. From that Ndef record, it creates a record array (with a single element, we have only one payload). From that record array, it creates an Ndef message with the NFCManager.make_NdefMessage_from_array_of_NdefRecord method.
Now it uses the peer-to-peer API, specifically the NFCManager.p2p_enable_foreground_nde_push method, to push the Ndef message.
:::ruby def start_nfc_push # print push message to console puts “Sending #{@params[‘push’].inspect}…” # make an english “en” payload from the push message payload = Rho::NFCManager.make_payload_with_well_known_text(“en”, @params[‘push’]) # create the hash; has one element in the array, text, well known text. hash = { ‘id’ => [0], ‘type’ => Rho::NdefRecord:: RTD_TEXT, ‘tnf’ => Rho::NdefRecord::TNF_WELL_KNOWN, ‘payload’ => payload } # create the record, the record array, and the message. record = Rho::NFCManager.make_NdefRecord_from_hash(hash) records = [record] msg = Rho::NFCManager.make_NdefMessage_from_array_of_NdefRecord(records)
# start push message
Rho::NFCManager.p2p_enable_foreground_nde_push(msg)
# notice on the UI that we started a push, render the index page for that.
@notice = "Started push."
render :action => :index
end
Stop Push Function
There is a button in the UI to stop the push. In the stop_nfc_push controller action, the NFCManager.p2p_disable_foreground_nde_push methods stops the NFC push.
def stop_nfc_push
  Rho::NFCManager.p2p_disable_foreground_nde_push
  # notice on the UI that we stopped push, render the index page for that.
  @notice = "Stopped push."
  render :action => :index
end
NFC Callback
In a previous webinar/tutorial, the nfc_callback method just printed out a timestamp for an NFC tag. Now it will parse out the message.
When a device receives a peer-to-peer message, the message shows up in the @params['messages'] argument in the callback. Since we know that we are only sending a single record in a single message, just access the first element in each array: ['messages'][0]['records'][0]. Grab the payload_as_string.
def nfc_callback
  if @params['messages'].size > 0 and @params['messages'][0]['records'].size > 0
    # Grab the payload from the record and message arrays
    @msg = @params['messages'][0]['records'][0]['payload_as_string']
  else
    @msg = "No payload"
  end
  # Show the message in a pop-up window.
  Alert.show_popup( {
    :message => @msg,
    :title => "NFC P2P",
    :buttons => ["Close"] }
  )
end
Displaying the NFC P2P Event in the View
The view, the app/Nfc/index.erb file, now has a form to let you send the push message text; it calls the controller action start_nfc_push. The form contains a list with the label and field for the message, and a button to start the message push.
The label uses the Rhodes built-in styling in the class fieldLabel. For the input field, remember that the payload @param name is push (refer to the start_nfc_push function code, discussed earlier in this tutorial), and assign some default text to the input field.
The button to start the message push uses the standardButton class.
<form method="POST" action="<%= url_for :action => :start_nfc_push %>">
  <ul>
    <li>
      <label for="text" class="fieldLabel">Push Message</label>
      <input type="text" name="push" value="Hello from NFC!"/>
    </li>
  </ul>
  <input type="submit" class="standardButton" value="Start Message Push!"/>
</form>
One more form stops the push; it calls the controller action stop_nfc_push.
<form method="POST" action="<%= url_for :action => :stop_nfc_push %>">
  <input type="submit" class="standardButton" value="Stop Message Push!"/>
</form>
Running nfc-rhodes Peer-to-Peer
Do you have two NFC-enabled Android devices? You can install the nfc-rhodes app on your device by getting and building the nfc-rhodes project, then for each device, connecting the device to your computer with the nfc-rhodes project and running the following command from the nfc-rhodes directory:
$ rake run:android:device
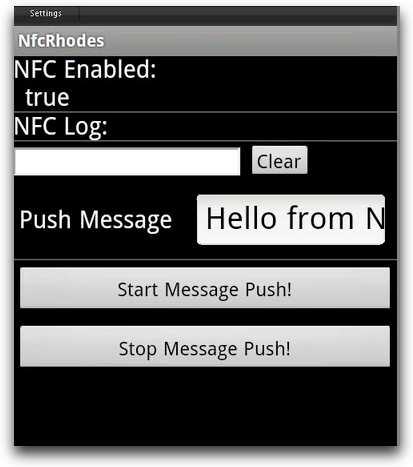
The nfc-rhodes app shows up on your device.
![]()
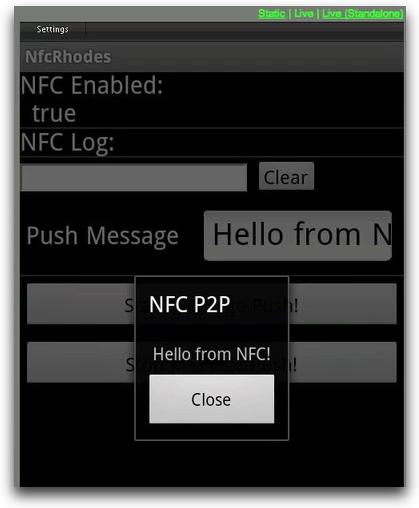
If you run the app, you will see the forms added to enter a push message and start the push, and to stop the push.
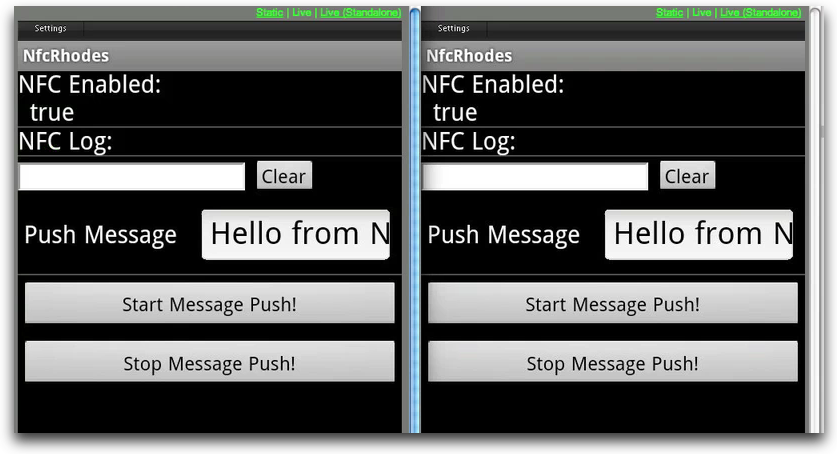
You can install and run nfc-rhodes on another device.
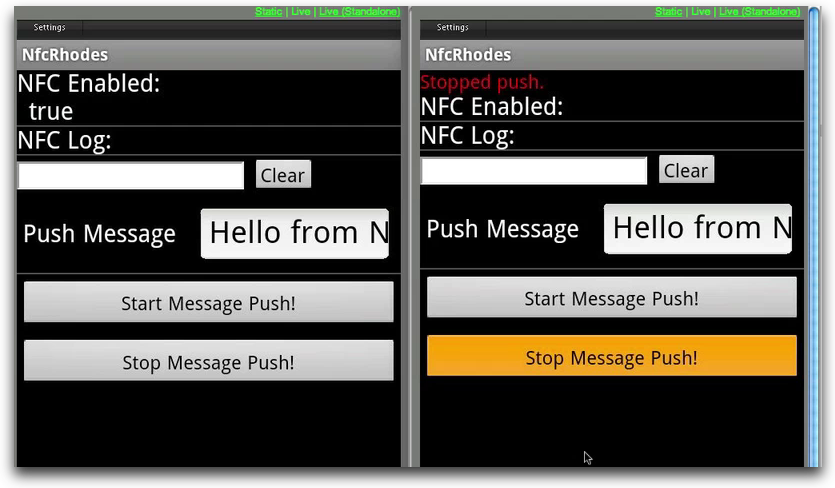
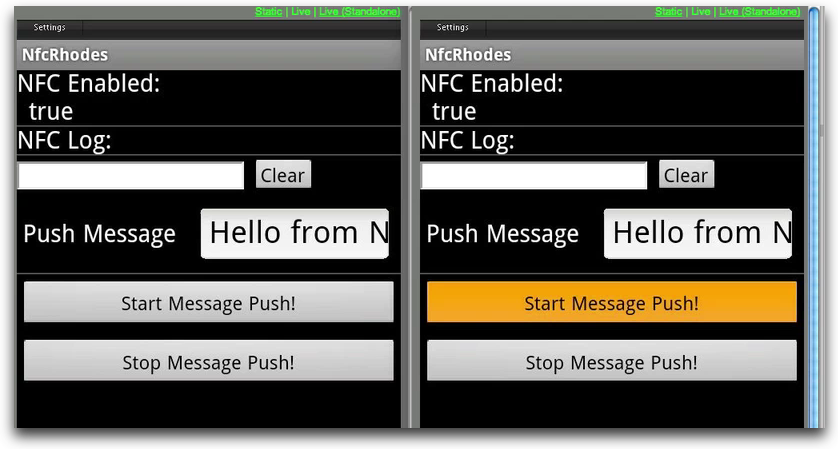
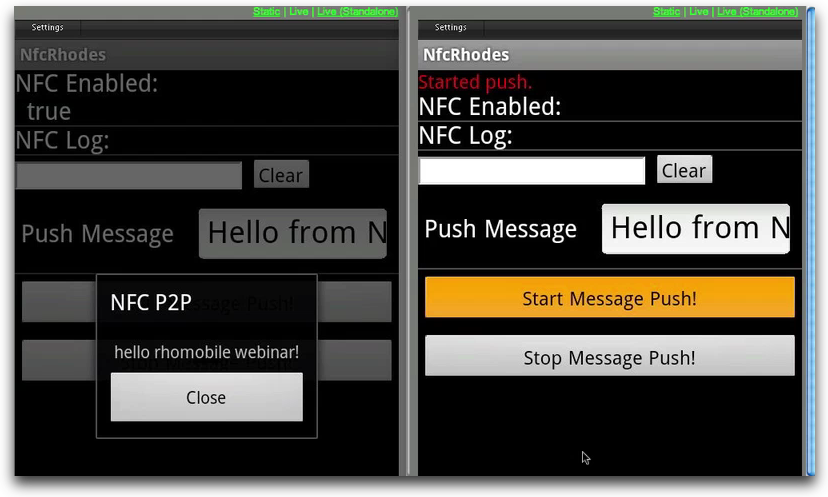
Now the device on the left is going to be the receiving device. Click the button to start the message push for the device on the right.
By holding the sending device within NFC range of the receiving device, we see the pop-up window on the receiving device that shows the received message.
You can also type a message into the sending device (like “hello rhomobile webinar!”), click the button to start the message push, and receive the new message.
If you press the stop push button on the sending device and hold it within NFC range of the receiving device, no message appears. The receiving phone does not receive a message.