Building RhoStudio Apps on RhoHub
RhoStudio lets you build your apps on RhoHub without leaving the RhoStudio IDE. Just select the remote build option when building in RhoStudio and RhoHub will perform the build for you.
You will need a RhoHub account. You will also use the RhoStudio IDE.
- Setting Up Connection from RhoHub to RhoStudio
- Building a RhoStudio App on RhoHub
- Creating a RhoStudio App from a RhoHub App
- Updating a RhoHub App with Changes in the RhoStudio App
- Updating a RhoStudio App with Changes in the RhoHub App
Setting Up Connection from RhoHub to RhoStudio
Before you can build your RhoStudio apps on RhoHub, you need to connect your RhoHub account to RhoStudio. From your RhoHub account, go to your Profile and open the API Token tab. Copy the API Token.

From RhoStudio, open RhoStudio Preferences.

Paste your API token into the API Token field and click OK.
Building a RhoStudio App on RhoHub
From RhoStudio, select your app in the Project Explorer. Then select RhoMobile->RhoHub Build from the main menu.
If your RhoStudio app is being put into your RhoHub account for the first time, a pop-up window will ask if you want to add your application to RhoHub. Click OK.
The RhoHub Application Wizard appears. It will have a checkbox checked that will “Create new application on RhoHub,” and it will also list the applications that you have in your RhoHub account.

If you are asked for your git password, enter it.
The RhoHub Application Build Wizard appears. Select the type of build you want for your app.

- App Git Revision: Defaults to git master branch.
- Rhodes Git Revision: Enter a different Rhodes Git revision if you do not wish to use the default.
- Target Device: Select the type of device you wish to build on.
- Platform Version: Select the platform (software) version for the target device.
Click Build. You will be asked to select a destination directory for the build. Select one and click Open.
You will get a message that the build has started. Then at the bottom of the RhoStudio window, you get a message about RhoStudio checking the remote build status.

A window appears when the build is finished.
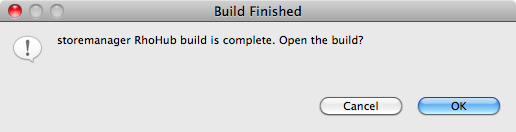
There will now be a zip file in the destination directory that you selected. Click OK to unzip the zip file.
In the unzip directory are two text files and your built application.
- app_info: contains the
- log.txt: the log file for this build.
- your-application-name.type: your build application. You can install this on your mobile device.
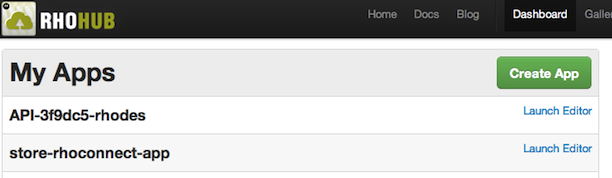
Your RhoHub account now contains a copy of your RhoStudio app under a generated name.
Creating a RhoStudio App from a RhoHub App
On RhoHub, open the app that you want to create in RhoStudio. From the App Info tab, click the icon to the right of the app Git URL to copy the URL.

In RhoStudio, open the “Git Repositories” view.

In the “Git Repositories” view, click on “Clone a Git repository.”
The Clone Git Repository - Source Git Repository window appears. Paste the Git URL you copied into the URI field. Other fields will be auto-filled.

Click Next. Enter your git password in the popup window and click Next.
In the Clone Git Repository - Branch Selection window, select the branch to clone from the RhoHub git repository and click Next.

In the Clone Git Repository - Local Destination window, note the path in the Directory field: that is where your RhoHub app will be cloned. You can select a different destination by clicking the Browse button. Click Finish.

From the RhoStudio main menu, select File->New->Project. In the New Project window, select the app type: it should match the application type of your RhoHub app (such as RhoMobile: RhoMobile Application). Click Next.

In the application generator wizard window, click the “Create application from existing sources” checkbox. Then click the Browse button and select the path to your project that appeared in the Clone Git Repository - Local Destination window - Directory field. This will fill the Application folder field with the path to the cloned application, and will fill the Project name field with the application name. Then click Finish.

The application now appears in your Project Explorer.

Updating a RhoHub App with Changes in the RhoStudio App
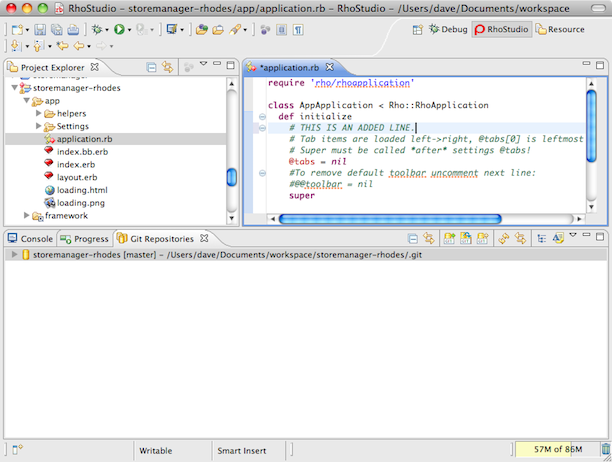
In the Project Explorer, select an application that you have linked with an application on RhoHub.
In the Git Repositories view, check for that selected project. If it is not there, click the icon to add the local project to the view.
![]()
Edit your application code in RhoStudio. Save your changes (File->Save).
In the Git Repositories view, select the local git repository for your application. Then right-click on the git repository in the Git Repositories view to open the context menu.

Select “Commit…”. The Commit Changes to Git Repository window appears. Enter a commit message. Check that the files you have changed are checked. Then click Commit.

Right-click again to open the context menu and select “Push…”. The git repository for your RhoHub account should be selected in the Configured remote repository. Click Finish.

You will get the Push Results window when the push to RhoHub is complete.

Your changes in your RhoStudio app will now be in your RhoHub app.
Updating a RhoStudio App with Changes in the RhoHub App
If you make changes to your app on the RhoHub side, you can pull those changes into your RhoStudio app. In the Git Repositories view, select the local git repository for your application. Then right-click on the git repository in the Git Repositories view to open the context menu. Then select “Pull” from the context menu.